


Substack offers an intuitive platform for newsletters, appealing to those looking to monetise their content quickly and easily. Ghost CMS, on the other hand, is a complete open-source content management system, offering in-depth customisation and flexibility to bloggers and content creators.
There are a number of reasons for migrating from Substack to Ghost:
- The need for more control over the content and design of your newsletter.
- Better SEO management
- Diversification of monetisation options
- Greater freedom in managing subscribers.
- No commission on sales with Ghost
- Etc...
Whatever your reasons, you've come to the right place to learn exactly how to migrate your newsletter from Substack to Ghost CMS step by step.
1. Preparing for migration
Exporting your subscribers from Substack
Before migrating to Ghost, you need to export your list of subscribers from Substack. Here's how to do it:
- Log in to your Substack account.
- Go to the dashboard and select 'Settings'.
- In the settings, look for an option called 'Export'.
- Click on 'Export Subscribers' to download a CSV file of your subscriber list.
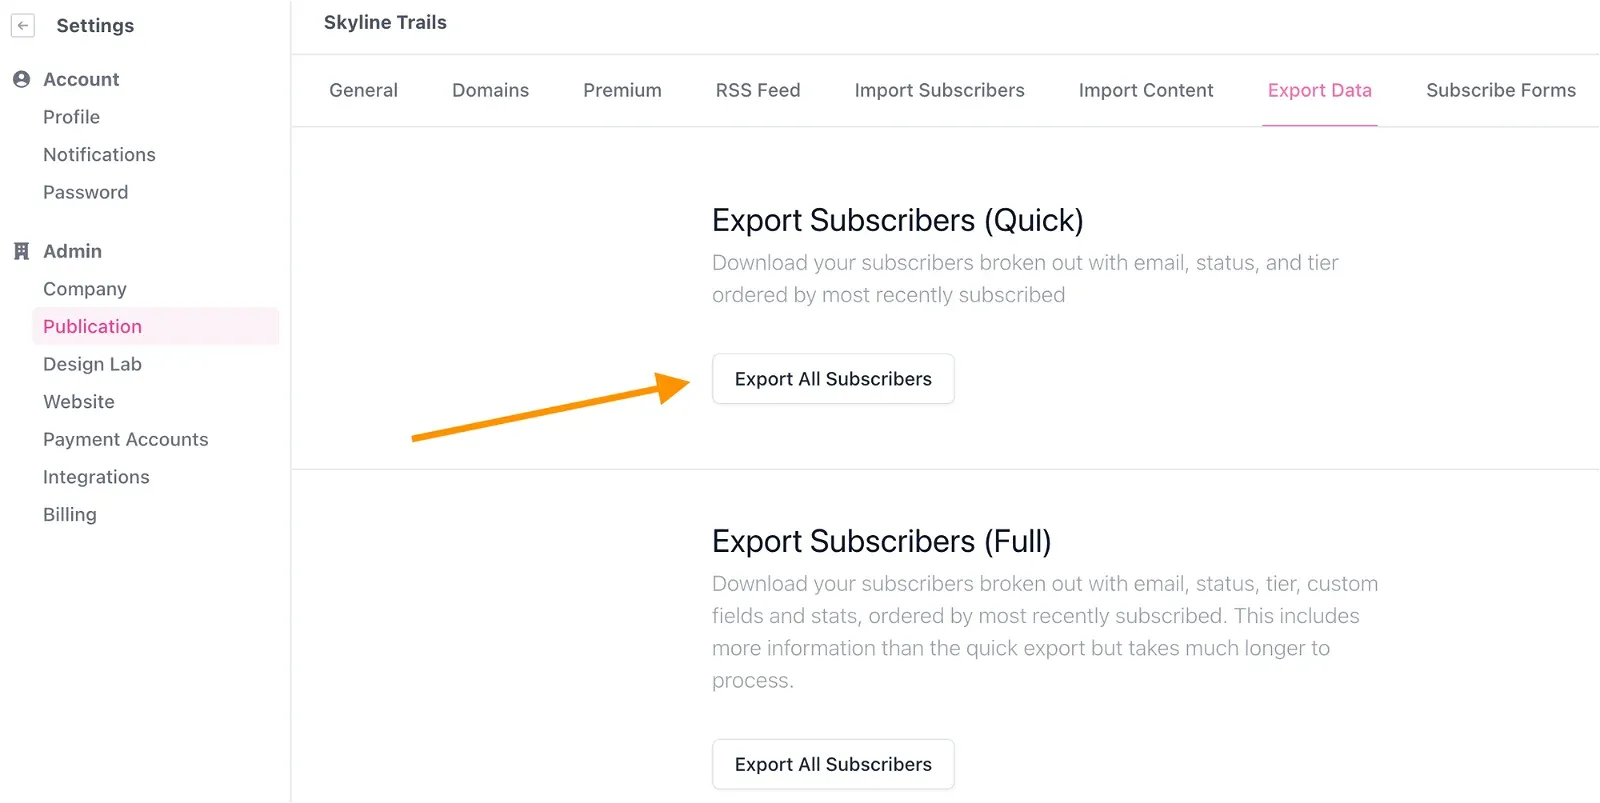
Instructions for accessing and using the Substack export tool
Once the CSV file is downloaded, ensure that the data is complete. Verify that email addresses, names, and any other relevant information are correctly recorded.
Tips for ensuring data integrity and completeness
- Check for duplicates and errors in email addresses.
- Ensure that the data matches the fields required by Ghost (e.g., email, name).
Managing Stripe accounts
If you use Stripe for monetization on Substack, you will need to link it to Ghost.
- In your Ghost dashboard, navigate to 'Settings' > 'Members'.
- Select 'Stripe' and connect your existing account.
Linking an existing Stripe account with Ghost
- Follow the on-screen instructions to authorize Ghost to access your Stripe account.
Tips for setting up a new Stripe account if necessary
- If you do not have a Stripe account yet, create one on the Stripe website.
- Follow the steps to link this new account to Ghost, as indicated above.
2.Importing subscribers into Ghost
To import data from Substack to Ghost CMS, you have two main methods available: using the Substack migration tool and universal import. Here's an overview of these two methods:
A. Using the Substack migration tool
The Substack migration tool in Ghost is specially designed to facilitate the transfer of data from Substack to Ghost. Here are the steps to use this tool:
Accessing the Substack migration tool:
- Log in to your Ghost dashboard.
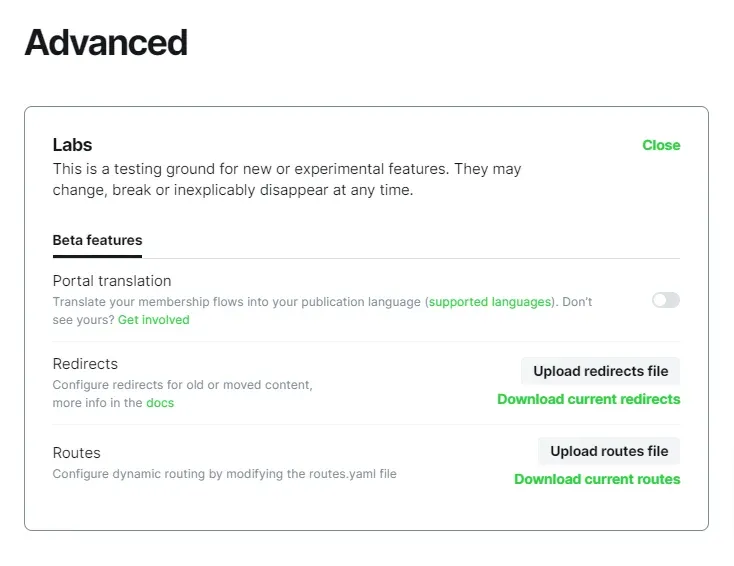
- Go to 'Settings' > 'Advanced' > 'Import/Export'.
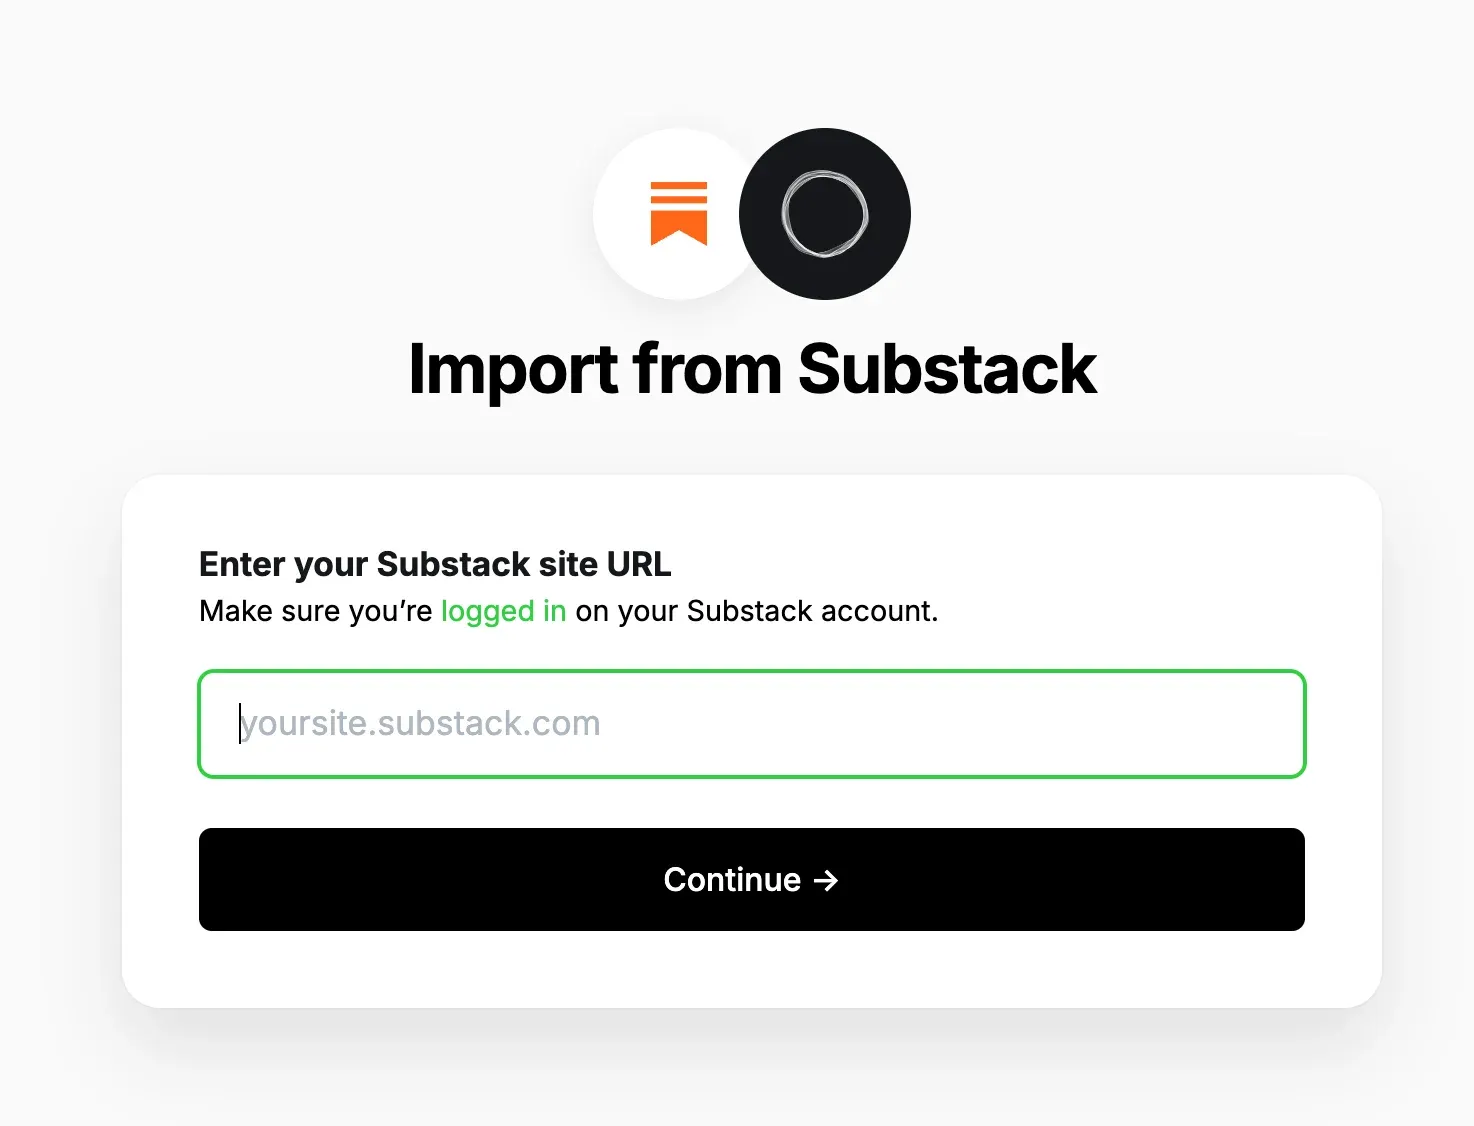
Importing using the Substack URL:
- Enter the public URL of your Substack and click 'Continue'.
Exporting and downloading Substack content:
- Follow the instructions to create an export on Substack and download the zip file.
Downloading content and subscribers:
- Return to Ghost Admin and download the zip file.
- Separately download the CSV files of free and paid subscribers.
Importing into Ghost:
- After downloading the files, follow the instructions to import content and subscribers into Ghost.
B. Using universal import
Universal import in Ghost is a flexible option for importing data from various file formats. This method is ideal if you have already prepared your data in a compatible format. Here's how to proceed:
Preparing import files:
- Ensure that your exported data from Substack is correctly formatted. For example, for subscribers, a CSV file with email addresses is necessary.
Accessing universal import in Ghost:
- Log in to your Ghost dashboard.
- Go to 'Settings' > 'Advanced' > 'Import/Export'.
- Select the 'Universal import' option.
Importing data:
- Upload your file (CSV, JSON, or ZIP) containing the exported data.
- Follow the instructions to finalize the data import into Ghost.
Each of these methods has its advantages. The Substack migration tool is optimized for a smooth transition from Substack with fewer preparation steps, while universal import offers more flexibility if you have already formatted data or from multiple sources.
PS: For those who prefer to avoid managing all these technical steps themselves, Abstract27 offers a comprehensive assistance service, from initialization to completion of your migration from Substack to Ghost CMS. This way, you can benefit from professional support to ensure a smooth transition without having to worry about technical details.

3.Other considerations for successful migration.
Organization of exported files for efficient migration
- Create separate folders for different types of content for easy organization.
- Name files consistently to facilitate identification.
Managing custom domains
If you have a custom domain for your Substack site, you'll likely want to transfer it to Ghost.
- Access your domain registrar and update DNS settings to point to your new Ghost instance.
- There may be a waiting period for changes to take effect (DNS propagation).
Strategies to minimize downtime during domain transfer
- Schedule the domain transfer during periods of low traffic.
- Inform your subscribers of the migration and potential downtime.
Redirects and SEO considerations to maintain link integrity
- Set up 301 redirects for old URLs to new ones to maintain SEO.
- Check all URLs to ensure they work correctly after migration.
4.Design and Branding on Ghost
After migrating your content and subscribers, it's time to customize the appearance of your Ghost site to reflect your branding and the design you had on Substack.
Customizing the Ghost interface
Ghost offers considerable flexibility in design and customization, allowing you to create a unique experience for your readers.
Selection and customization of themes:
- Explore themes available in the Ghost marketplace or on other platforms.
- Choose a theme that aligns with the aesthetic of your Substack site.
- Customize the theme by adjusting colors, fonts, and layout to match your branding.
Adding custom CSS and HTML:
- For more advanced modifications, use Ghost's 'Code Injection' feature to add custom CSS or HTML.
- This can be useful for adjusting specific design elements or integrating third-party features.
- However, we advise against it if you don't have advanced knowledge of CSS and HTML.
Migration of navigation links and special pages
- Transferring navigation structure: Replicate the menu structure of your Substack site by adjusting navigation links in Ghost.
- Special pages: Recreate pages such as 'About' and 'Contact' in Ghost. Use the Ghost editor to create these pages and add them to your navigation menu.
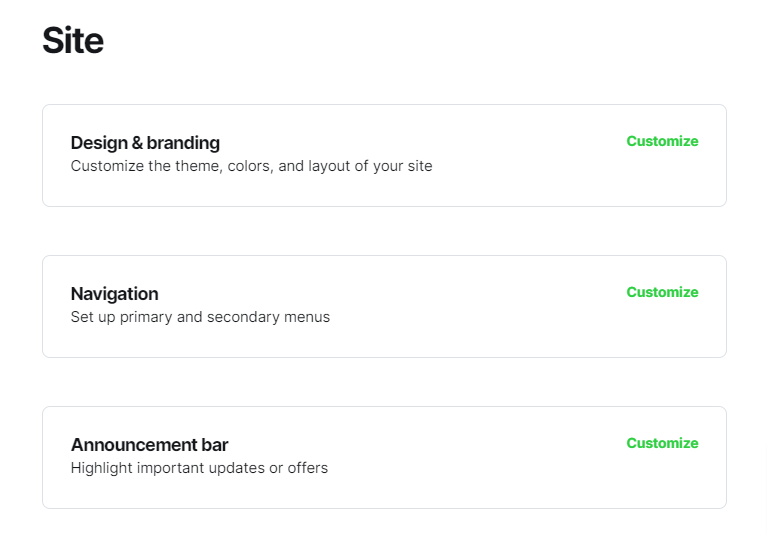
Steps to recreate the navigation structure in Ghost
- Go to 'Settings' > 'Navigation' in your Ghost dashboard.
- Configure navigation links to reflect the structure of your Substack site.
Transferring special pages like 'About' and 'Contact'
- Create new pages in Ghost and copy the content from your Substack pages.
- Add these pages to the navigation menu for easy accessibility.
5. Domain and CDN Configuration
After customizing your Ghost site, the next step is to configure your custom domain and integrate a Content Delivery Network (CDN) to optimize your site's performance.
Configuring the custom domain
Associating your custom domain with your Ghost site is essential to maintain your brand identity and facilitating recognition by your subscribers.
Domain registration and linking with Ghost
- If you already have a registered domain name for your Substack site, you'll need to update DNS settings to point to your new Ghost site.
- Log in to your domain registrar (like GoDaddy, Namecheap, etc.) and locate the DNS management section.
- Update A or CNAME records to point to your Ghost hosting.
Managing DNS propagation delays
- Note that DNS changes may take up to 48 hours to fully propagate.
- During this time, some visitors may be directed to the old site. Plan this transition during a low-traffic period to minimize impacts.
Cloudflare CDN Integration
Using a CDN like Cloudflare can improve the speed and security of your site.
Benefits of using Cloudflare with Ghost
Cloudflare offers fast content distribution, protection against DDoS attacks, and automatic optimizations.
- It can also help reduce hosting costs by minimizing bandwidth required directly from your Ghost server.
Configuring Cloudflare settings for optimal performance
- Sign up for Cloudflare and add your domain.
- Follow Cloudflare's instructions to change your domain's nameservers (DNS) with your domain registrar.
- Configure security and performance settings according to Cloudflare's recommendations.
6. Configuration of Messaging and Newsletter Services for Ghost CMS
Effective configuration of messaging services is essential for newsletter management and communication with subscribers.
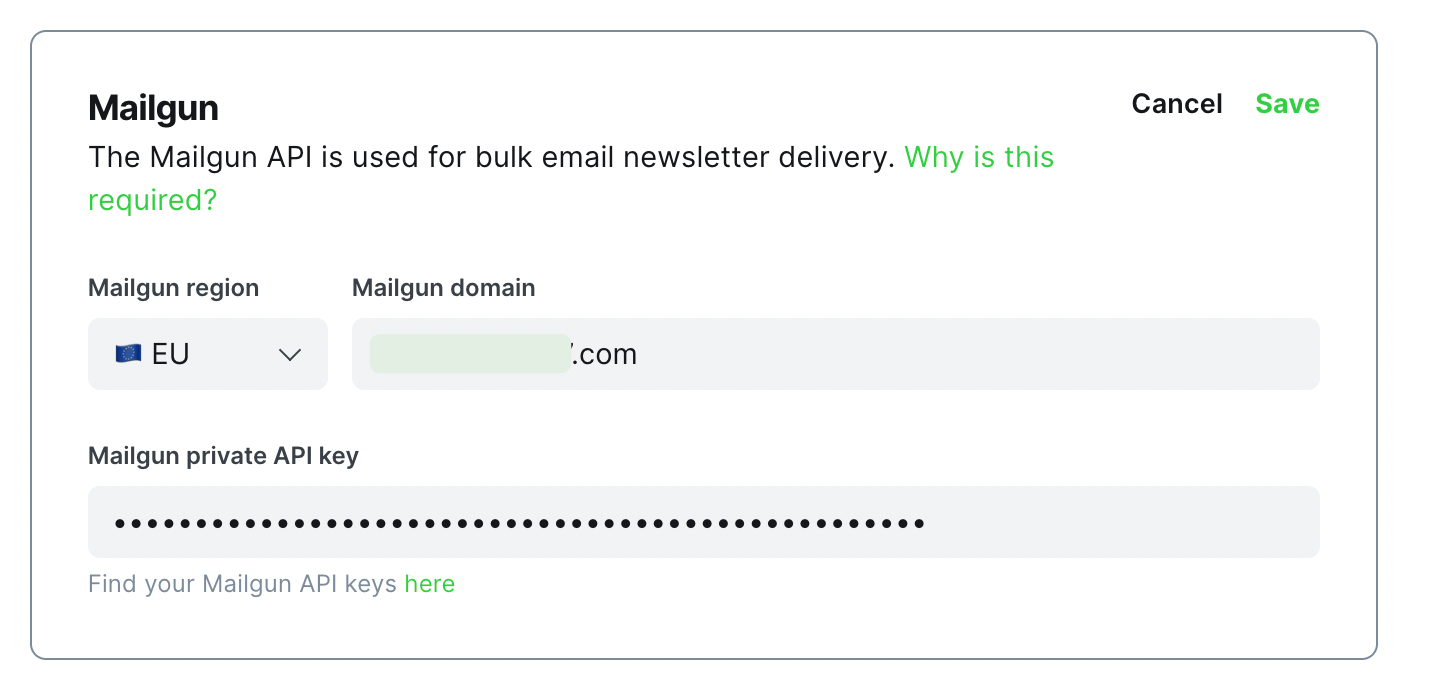
Ghost CMS is compatible with Mailgun, providing consistency in email delivery service.

The general configuration of email services with Ghost
Registration and account creation
- Sign up for the Mailgun email service.
Configuration of the service in Ghost
- In the Ghost dashboard, navigate to 'Settings' > 'Mailgun'.
- Enter the SMTP configuration details provided by your email service. This typically includes the SMTP server address, port, username (usually an email address), and password.
Verification and validation of the email account
- Some services require verification steps, such as confirming your email address or adding DNS records to your domain.
Best practices for email deliverability
Sender authentication
- Set up SPF, DKIM, and possibly DMARC records for your domain to improve email deliverability and reputation.
Configuration testing
- Send test emails to verify that the configuration works correctly and emails reach the inbox rather than the spam folder.
Subscriber list management
- Maintain a clean subscriber list, with easy opt-outs, to respect user preferences and maintain a good sender reputation.
Configuration of DNS settings for email delivery
Depending on the chosen service, you may need to add or modify specific DNS records for your domain to validate and optimize the email-sending configuration.
Monitoring and optimization of email performance
- Use tools and reports provided by your email service to monitor the performance of your email campaigns, including open, click, and bounce rates.
- Adjust your content and sending frequency strategies based on this data to maximize engagement and deliverability.
By carefully choosing and configuring your email service for Ghost CMS, you can ensure effective communication with your subscribers while leveraging the specific benefits offered by each provider.
PS: For those who prefer to avoid managing all these technical steps themselves, Abstract27 offers a comprehensive assistance service, from initialization to completion of your migration from Substack to Ghost CMS. This way, you can benefit from professional support to ensure a smooth transition without having to worry about technical details.
Conclusion
The migration from Substack to Ghost is a process that requires careful planning and attention to detail, but the benefits in terms of customization, financial control, Google ranking, and creativity are worth it.
Each step, from preparation to content and subscriber migration, to design customization and email service configuration, plays a crucial role in the success of the migration.
With your site now active on Ghost, explore all the advanced features that the platform has to offer. Experiment with different themes, plugins, and monetization strategies to make the most of your site.


